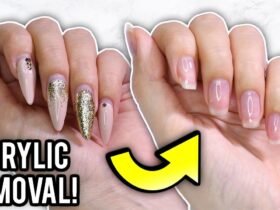
Acrylic nails are a popular cosmetic enhancement, offering beauty enthusiasts a durable and long-lasting nail option. However, the removal process can be daunting and, if done incorrectly, damaging to the natural nails. This comprehensive guide will walk you through the steps to safely and effectively remove acrylic nails at home, minimizing the risk of damage to your natural nails. Whether you’re looking to give your nails a break or prepare them for a new set of acrylics, this guide has got you covered.
Understanding Acrylic Nails
Before diving into the removal process, it’s essential to understand what acrylic nails are. Acrylic nails are created by mixing a liquid monomer and a powder polymer to form a hard protective layer over the natural nails, which can then be shaped and painted. While they enhance the beauty of your hands, the removal process requires patience and care to avoid damaging the underlying natural nail.
Preparing for Removal
Proper preparation is key to safely removing acrylic nails. Gather the necessary tools and materials before starting the process to ensure a smooth and efficient removal. You will need:
- Acetone (100% pure is best)
- Nail clippers
- A nail file
- A bowl
- Foil strips
- Cotton balls or pads
- Petroleum jelly
- A nail buffer
- Moisturizer or nail oil
Step-by-Step Removal Process
Trimming and Filing
- Trimming: Start by using nail clippers to trim the acrylic nails down as short as possible without cutting your natural nails.
- Filing: Use a nail file to gently file the topcoat, nail polish, or any decoration off the acrylic nails. This step is crucial as it allows the acetone to penetrate the acrylic more efficiently, facilitating easier removal.
Acetone Soak
Acetone is a powerful solvent that effectively dissolves acrylic nails. However, it can be drying to the skin, so it’s important to use it carefully.
- Protect Your Skin: Apply petroleum jelly to the skin surrounding your nails to protect it from the drying effects of acetone.
- Prepare the Acetone Soak: Warm the acetone slightly by placing the acetone container in a bowl of warm water. Do not microwave the acetone or use direct heat, as it is highly flammable.
- Soak Cotton Balls: Soak cotton balls in the warm acetone, then place them directly on the acrylic nails.
- Wrap with Foil: Secure the cotton balls in place by wrapping each fingertip with a strip of foil. This helps keep the cotton balls in place and prevents the acetone from evaporating too quickly.
- Wait: Leave the acetone-soaked cotton balls on your nails for at least 20-30 minutes. The time required can vary depending on the acrylic’s thickness and the acetone’s effectiveness.
- Check Progress: After 20-30 minutes, gently remove the foil and cotton balls from one nail to check the progress. The acrylic should have a gel-like consistency and easily peel away from the natural nail.
- Remove Acrylic: Use a cuticle pusher or orange stick to gently scrape the acrylic off your nails. If the acrylic is still hard, reapply the acetone-soaked cotton ball and wait a few more minutes.
Aftercare
Following the removal of the acrylic nails, it’s important to care for your natural nails and the surrounding skin, which can be dry and fragile.
- Buff Your Nails: Gently buff the surface of your natural nails to smooth out any roughness or residual acrylic.
- Moisturize: Wash your hands thoroughly to remove the acetone, then apply a generous amount of moisturizer to your hands and nails. For extra nourishment, use cuticle oil on your nails and cuticles.
- Rest Your Nails: If possible, give your nails a break before applying another set of acrylics or any other type of artificial nail. This allows your natural nails to recover and regain their strength.
Tips for Safe Acrylic Nail Removal
- Patience is Key: Rushing the removal process can result in damage to your natural nails. Allow sufficient time for the acetone to work.
- Avoid Force: Never force or pry the acrylic nails off, as this can rip layers off your natural nails, weakening them and making them prone to breakage and infection.
- Hydration: Keep your nails and skin hydrated before, during, and after the removal process to combat the drying effects of acetone.
- Professional Removal: If you’re uncomfortable with the removal process or encounter difficulties, consider visiting a professional nail technician to ensure the safe removal of your acrylic nails.
Conclusion
Removing acrylic nails at home can be a straightforward and safe process with the right tools, techniques, and precautions. By following this comprehensive guide, you can ensure the health and beauty of your natural nails are preserved throughout the removal process. Remember, the condition of your natural nails and skin is paramount, so take the time to perform each step carefully and hydrate your nails and skin before, during, and after the removal process. With patience and care, you can successfully remove your acrylic nails and enjoy healthy, beautiful natural nails.
Read Also: How to Delete Apps on iPhone


